
 If you're making an instant yeast rising bread, then most of the time, you will begin with Step 2. However, if you're making a fermented bread like sourdough, then it's important to refresh or prepare your pre-ferment anywhere from a few days to several hours before making your homemade loaf.
A pre-ferment is when you prep a portion of the bread dough ahead of time and then mix it into the final mixture. Pre-ferment helps to improve the strength, hydration, flavor and the aroma of the dough. Additionally, pre-ferments allow you to use less yeast overall, which can boost your bread's flavor. In many cases, a pre-ferment can be made just hours before baking your bread. However, more traditional ferments require more time and are often made up to 48 hours in advance.
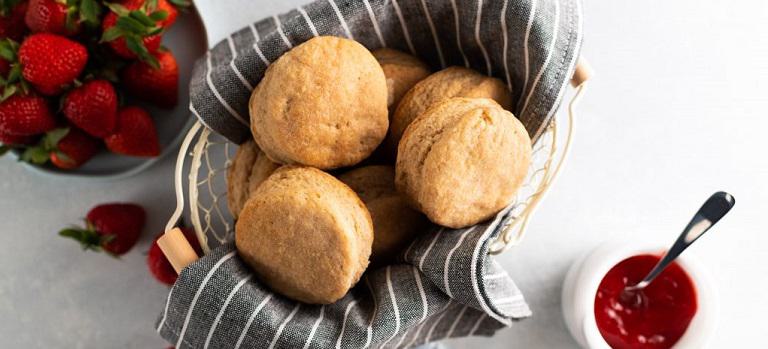
For a delicious sourdough bread recipe, make these Sourdough Biscuits.
If you're making an instant yeast rising bread, then most of the time, you will begin with Step 2. However, if you're making a fermented bread like sourdough, then it's important to refresh or prepare your pre-ferment anywhere from a few days to several hours before making your homemade loaf.
A pre-ferment is when you prep a portion of the bread dough ahead of time and then mix it into the final mixture. Pre-ferment helps to improve the strength, hydration, flavor and the aroma of the dough. Additionally, pre-ferments allow you to use less yeast overall, which can boost your bread's flavor. In many cases, a pre-ferment can be made just hours before baking your bread. However, more traditional ferments require more time and are often made up to 48 hours in advance.
For a delicious sourdough bread recipe, make these Sourdough Biscuits.
 Now it's time to start baking! Once you have all the ingredients on hand, start by following the steps in your easy bread recipe and mix your bread ingredients. Take a large bowl and pour the flour (bread flour, all purpose flour, or any flour indicated in the recipe) and liquid in, according to the method you're using. Salt and the starter or pre-ferment yeast mixture should be set to the side in this step and added later on.
When mixing, you'll want to make sure that all ingredients are mixed evenly so that there are no dry lumps of flour in the dough and everything is adequately hydrated. While you may begin to work the dough by hand in this step, you'll want to wait until later on in the process to knead bread dough.
For a bread with minimal baking steps, try this Soy Bread Recipe.
Now it's time to start baking! Once you have all the ingredients on hand, start by following the steps in your easy bread recipe and mix your bread ingredients. Take a large bowl and pour the flour (bread flour, all purpose flour, or any flour indicated in the recipe) and liquid in, according to the method you're using. Salt and the starter or pre-ferment yeast mixture should be set to the side in this step and added later on.
When mixing, you'll want to make sure that all ingredients are mixed evenly so that there are no dry lumps of flour in the dough and everything is adequately hydrated. While you may begin to work the dough by hand in this step, you'll want to wait until later on in the process to knead bread dough.
For a bread with minimal baking steps, try this Soy Bread Recipe.
 Now that you've let your dough autolyse, it's time to add your sourdough starter or pre-ferment and knead your dough to perfection. When massaging your dough, you must be careful not to over-knead or under-knead bread. Both can drastically affect the final bread texture.
The goal of kneading your dough is to build up the gluten molecules and create strength and shape. Doing so will ensure that the loaf of bread holds its shape and retains the gas it produces, resulting in a light and airy pastry. While there are many different techniques used to knead dough, we recommend going with one you feel more comfortable with.
Whether you prefer to knead your dough by hand or use a hand mixer to get the job done a little quicker, you must check in on your dough periodically to make sure it isn't over needed. The under-kneaded mixture can be fixed with a bit more kneading.
However, it is nearly impossible to fix over-kneaded dough. Baking over-kneaded dough will likely result in a dense and crumbly bread loaf.
For a bread recipe that doesnt require kneading try out this No-Knead Artisan Bread.
Now that you've let your dough autolyse, it's time to add your sourdough starter or pre-ferment and knead your dough to perfection. When massaging your dough, you must be careful not to over-knead or under-knead bread. Both can drastically affect the final bread texture.
The goal of kneading your dough is to build up the gluten molecules and create strength and shape. Doing so will ensure that the loaf of bread holds its shape and retains the gas it produces, resulting in a light and airy pastry. While there are many different techniques used to knead dough, we recommend going with one you feel more comfortable with.
Whether you prefer to knead your dough by hand or use a hand mixer to get the job done a little quicker, you must check in on your dough periodically to make sure it isn't over needed. The under-kneaded mixture can be fixed with a bit more kneading.
However, it is nearly impossible to fix over-kneaded dough. Baking over-kneaded dough will likely result in a dense and crumbly bread loaf.
For a bread recipe that doesnt require kneading try out this No-Knead Artisan Bread.
 Shaping your dough is the last hands-on step of bread making. Once your dough has fully fermented, it's essential to mold the bread into the shape you've chosen. You'll want to create a shape that can keep its form and provide excellent surface tension as your bread rises. Doing so will help your bread expand and bake beautifully in the oven.
When shaping your dough, be careful not to be too rough. Developing your bread too aggressively could cause the gasses in bubbles to release and create a more dense loaf than you'd like. While this step of the bread-making process may take some extra practice, it is a crucial part of the result.
Once your bread has been properly shaped and placed in the loaf pan it's important to give it one last final proof, before baking it. This will allow your loaf to re-fill with carbon dioxide. This is a crucial step in how to create airy bread. If you feel like you were too rough during the shaping process, then we recommend letting your bread proof for a little longer than stated in the recipe.
To create tasty multi-grain bread that is easily shaped, use our 10 Grain Bread Mix.
Shaping your dough is the last hands-on step of bread making. Once your dough has fully fermented, it's essential to mold the bread into the shape you've chosen. You'll want to create a shape that can keep its form and provide excellent surface tension as your bread rises. Doing so will help your bread expand and bake beautifully in the oven.
When shaping your dough, be careful not to be too rough. Developing your bread too aggressively could cause the gasses in bubbles to release and create a more dense loaf than you'd like. While this step of the bread-making process may take some extra practice, it is a crucial part of the result.
Once your bread has been properly shaped and placed in the loaf pan it's important to give it one last final proof, before baking it. This will allow your loaf to re-fill with carbon dioxide. This is a crucial step in how to create airy bread. If you feel like you were too rough during the shaping process, then we recommend letting your bread proof for a little longer than stated in the recipe.
To create tasty multi-grain bread that is easily shaped, use our 10 Grain Bread Mix.
